Crafter I am not but I like to try. I purchased this cricut from a friend of my daughters over a year ago and I have just started checking it out. I have made several cards and vinyl decals. It looks like it will be a lot of fun.
Showing posts with label Craft Projects. Show all posts
Wednesday, January 30, 2019
Tuesday, March 20, 2012
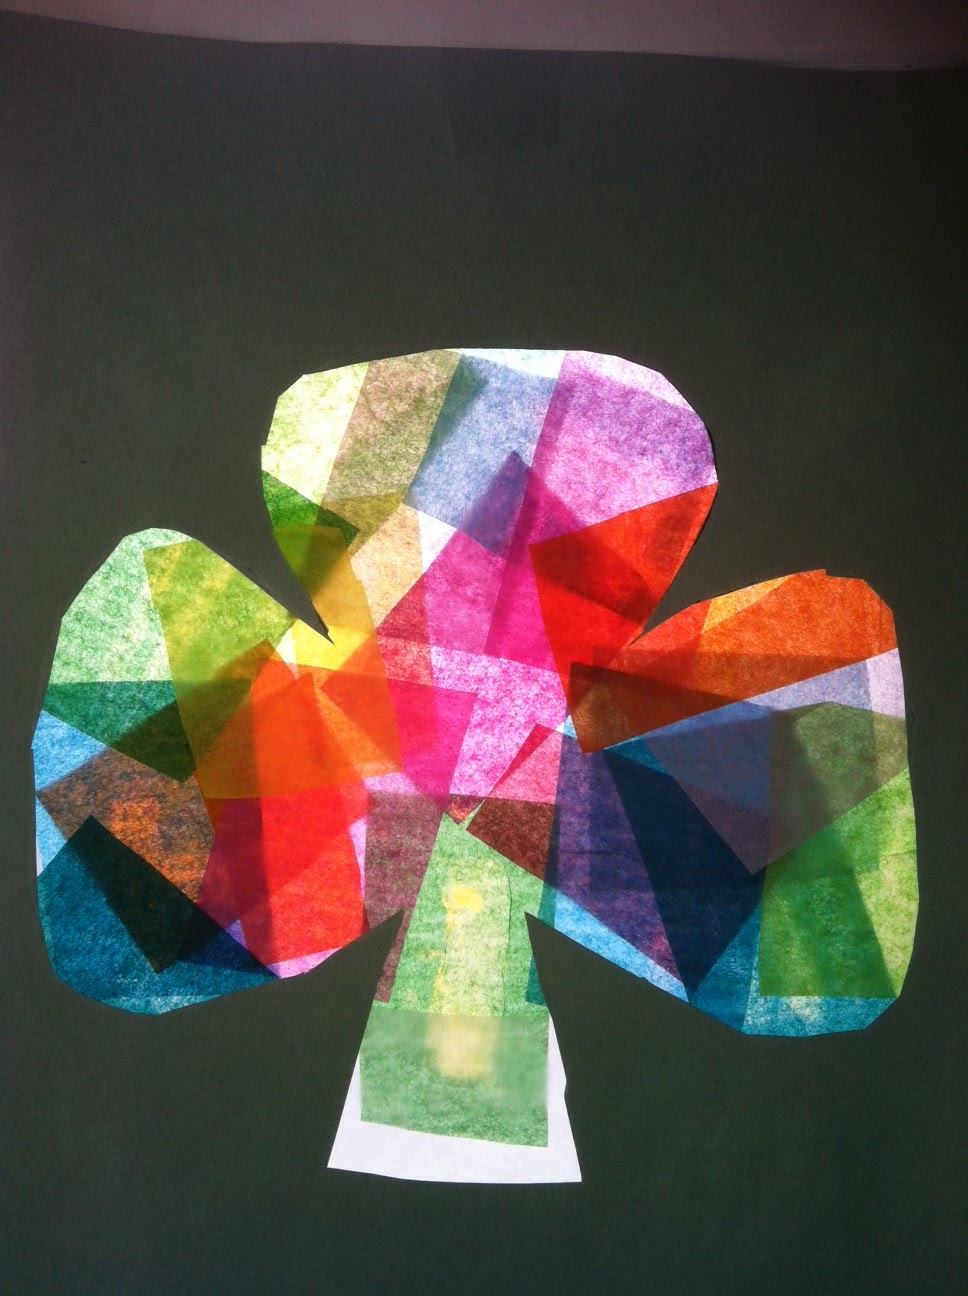
Sun Catcher Cloverleaf
We did a little craft for St. Patricks Day. I printed out a large cloverleaf. Placed wax paper over the shape. Then we placed cut pieces of tissue paper and glued over the shape so that all was covered. Finally I cut the shape out of construction paper and taped the clover over it. Placed in window and enjoyed!
Jackson (6) was really proud of his work and did almost all of it himself!
Tuesday, April 5, 2011
Easter Crafting
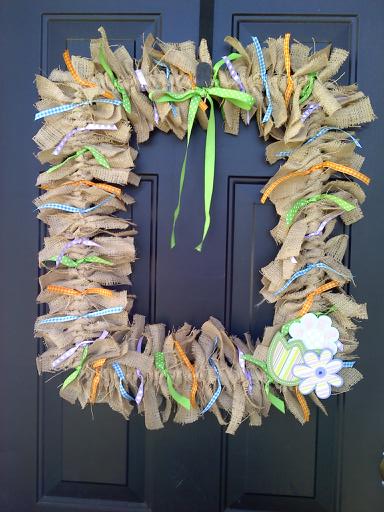
This is my new wreath. I found the idea on another blog, but I can not locate it now. So if it is your let me know and I will gladly give you credit!! I love the way it turned out, but I learned that I do not like burlap....it is everwhere. 
This is an idea that I took from an idea over at Shanty 2 Chic. Ashley's idea was a Christmas theme, but I put an Easter spin on it.
I pick up Allison and Jack from Mawmaw's in the morning!! I am excited with Dad out of town .... Lindsey and I just don't make enought noise :O)

This is an idea that I took from an idea over at Shanty 2 Chic. Ashley's idea was a Christmas theme, but I put an Easter spin on it.
I pick up Allison and Jack from Mawmaw's in the morning!! I am excited with Dad out of town .... Lindsey and I just don't make enought noise :O)
Saturday, August 14, 2010
Ideas for future projects
This post will not make sense to anyone but me, but these are some ideas swimming in my head and I want to make sure I can recall them when I am ready to get started! So thanks in advance for the nonsense post!
Board and Batten either master bedroom hall and stairs or living room dining room and stairs ?and hall
window painted and sanded w/ wreath hanging on porch
build a headboard - fence, shutters, b-n-b shutters
photo wall on stairway
Board and Batten either master bedroom hall and stairs or living room dining room and stairs ?and hall
window painted and sanded w/ wreath hanging on porch
build a headboard - fence, shutters, b-n-b shutters
photo wall on stairway
Sunday, April 25, 2010
Make It Yourself Homemade Vanilla
This past September 2009 I made Homemade Vanilla. This really made the best Vanilla I have ever used!
What I started with:
Next I washed and air dried all my bottles and lids.
Cut the vanilla beans length wise, then cut into approximately 3 sections to place into the bottles.
Place 6 cut pieces of vanilla beans into the bottles.
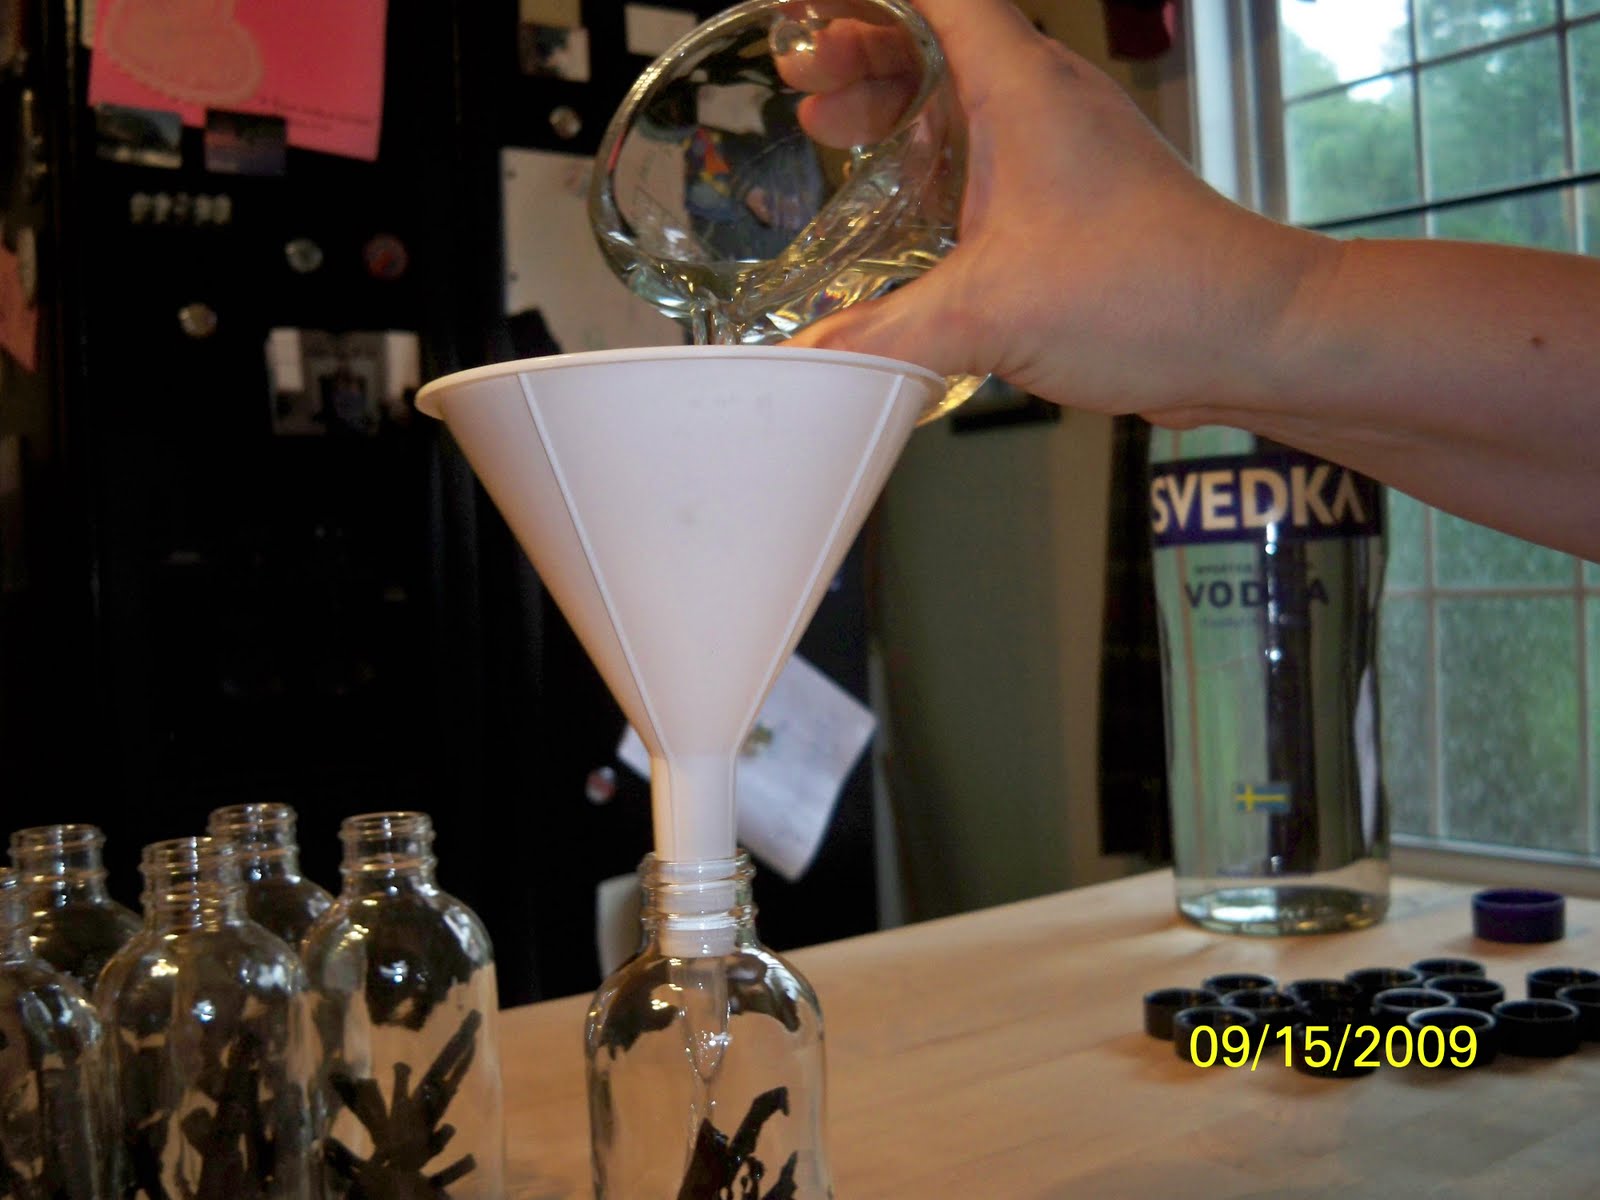
Measure 1/2 cup of Vodka.
Use the funnel to pour into each bottle.

What I started with:
- 24+ organic Tahitian vanilla beans (ordered from a vendor on Ebay see my link below)
- 15 4oz clear Boston Round Bottles (see link below to order)
- Large Bottle of Svedka Vodka - recommended by others online.
- Funnel
- Measuring Cup
- Knife or Kitchen Scissors
Use the funnel to pour into each bottle.
After the bottles are all filled I placed the lids on each bottle.

Placed them into a card board box closed the lid and placed into a cool dark place (my closet) and left until March 2010 (6 full months)
Removed and started using!! Great Stuff and smells so GOOD!!! This would make a wonderful Christmas Gift. It would work out great if you started in June or maybe save for Christmas in JULY as a make ahead gift.

Placed them into a card board box closed the lid and placed into a cool dark place (my closet) and left until March 2010 (6 full months)
Supplies Used :
Vanilla Beans came from HERE
Glass Bottles came from HERE
Wednesday, July 29, 2009
My Homely Angel
Just wanted to share....
I have been trying my hand at embroidering lately. I am working on the different stitches and my stitch size. I love the primitive designs, but this poor angel came out a little homely looking.
Thursday, July 2, 2009
Christmas in July - Day 2
I know I have no plans to post daily, but I found an excellent tutorial this afternoon and pulled out the old sewing machine and got busy.
Thanks to the lovely Cocoa @ Chocolate on My Cranium... (great name) she has posted on her blog an excellent tutorial for Crayon Rolls. These are the cutest little things I have ever seen.
Anywho ... like I mentioned pulled out the sewing machine and with in no time I had a lovely crayon roll myself. Please visit Cocoa to see the other super cute tutorials that she has up!!
Merry Christmas in July!!! ..... Yes I know I should have used new crayons .... but we never have new crayons ... I was just lucky these weren't broken :O)

Thanks to the lovely Cocoa @ Chocolate on My Cranium... (great name) she has posted on her blog an excellent tutorial for Crayon Rolls. These are the cutest little things I have ever seen.
Anywho ... like I mentioned pulled out the sewing machine and with in no time I had a lovely crayon roll myself. Please visit Cocoa to see the other super cute tutorials that she has up!!
Merry Christmas in July!!! ..... Yes I know I should have used new crayons .... but we never have new crayons ... I was just lucky these weren't broken :O)
Thursday, December 18, 2008
Holiday Crafts
We are wrapping up loose ends with homeschool this week in preparation to be off for 3 weeks for the holidays. This leaves us extra time to do some crafts this week. So far we have made reindeer with our hands and feet, and also crayon stain glass looking angels. Enjoy our photos. (there are lots of photo's :O)
Allison with her reindeer!
Jack is very proud of his. He could not figure out what I was doing tracing his foot and his hands.
The light from outside made them look washed out. We hung them up in the dining room!
Jack working hard to grate his crayons.
Allison got the easy grate....not quite sure that was fair hmmm? 
Allison with her reindeer!
Jack is very proud of his. He could not figure out what I was doing tracing his foot and his hands.
The light from outside made them look washed out. We hung them up in the dining room!
Jack working hard to grate his crayons.
Allison got the easy grate....not quite sure that was fair hmmm? 
Jack's finished product.
Allison's finished product
My only comments about the stain glass project is to advise anyone who wants to do this to use supper thick construction paper or trim the melted crayons better, because ours show through our dollar store paper.
Hope you enjoyed our craft photo's we enjoyed making them!
Merry Christmas and Happy New Year!!!
Wednesday, December 3, 2008
Nativity Craft
I could not find the website that I first saw this craft on, but I remembered somewhat how it was done and just improvised were needed. (ans YES we always seem to do crafts while we are still in our PJ's) This could make an excellent homemade Christmas gift for someone!
Allison's Nativity
A better shot of how the manger turned out.
Enjoy the season!!!
First this is a child/parent craft and takes alot of help at least for my kids from me.
Items needed:
2 small flower pots
1 small saucer
felt
jute
2 heads from the wood pieces in the craft store
2 small bodies from the wood pieces in craft section
paint
glue
My kiddos painted the pots & saucer, and I painted the heads and small bodies. Then we cut out pieces of felt just enough to cover Mary & Joseph and wrap baby Jesus in. Cut 8 pieces of Jute about 5 inches long for Mary's hair, and 12 pieces of jute about 3 inches long for the hay in manger. Then I took the hot glue gun and glued the heads on the bodies and attached the hair to Mary and then glued the jute into the manger. Then we glued on the felt to the baby Jesus and Mary & Joseph and let everything dry. I think they turned out very nice. I hope everyone enjoys!! Merry Christmas!!
Jack's Nativity
Allison's Nativity
Thursday, November 20, 2008
Been a long week!
I know it is only Thursday, but it has been one of those weeks.
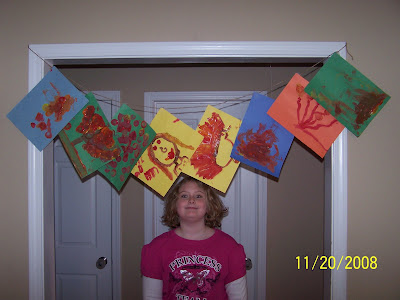
This is a short post to just show y'all some of what we did get done that was fun!
I thought everyone might like to see and update on how our Thanks Tree is coming along.
Have a good night!
I have a terribly busy week next week planning and executing Thanksgiving for 20+ so I will not be on or posting much if any! I hope everyone has a blessed Thanksgiving!!!
Thursday, November 13, 2008
Fleece No Sew Blankets
Someone emailed me to see the first fleece blanket I did. This is it. It is for my niece Riley for Christmas! 
See my other post on no sew fleece blankets for a great site that has easy how-toos!!
Saturday, November 8, 2008
A busy Saturday
This weekend my children were at Grandma's house so I got busy....
I have painted Jack's room so that he now has a Cars themed BIG BOYS room since he turns 3 on Tuesday!!! I will include pictures once we get the toddler bed out of the bedroom.
Then I did some pre-Christmas looking at some local stores ...all by myself :OP
Finally I got another Christmas present made. Jack's Thomas the Train NO-SEW blanket. I am very proud of it. This one only took me 45 min compared to the 2 hours the first one took for my niece Riley. You can get directions for the no sew fleece blanket HERE!! Here is Jack's blanket.....

Thursday, October 30, 2008
Please visit the above site. I have also added her button to my side bar for quick reference. This website is great for anyone with a preschooler. There is a great resource of ideas and crafts to keep things at there level of learning.
We often do our craft in the morning right after breakfast, because Jack is already in his seat and still wide a wake. I have found if I wait until he plays a while he is tired, or just plain to wiggly to get anything done. Anyhow.... enjoy the site there are boodles of ideas there!!!
Have a great Thursday!! I probably will not post anything else until later in the weekend and then we will have great Halloween pictures!!!!
Tuesday, October 28, 2008
Thursday, October 23, 2008
Pumpkin Votives
This is NOT a craft for a 2 year old, and there are no pictures taken while we were doing this because Jack was a mess, my table was a mess and there was orange napkins stuck to everything :O)
BUT : When it is all said and done...it was fun and Allison and I helped Jack get some paper stuck to the jar not just stuck to him.
What you need:
Small jar or glass
white glue
water
sponges (can use paintbrushes, but sponges worked better for us)
napkins torn into 1 inch pieces
Mix the water and white glue equal parts. Tear or cut the napkin into 1 inch pieces. Sponge on some glue mix to the jar and place a piece of napkin on it then sponge on some more glue mix. Continue until all sides are covered.
Our finished jars drying in the sun. Jack's is the one on the left :O)
Then we drew the faces on with perm markers. And placed a votive inside. I used the flameless because I was afraid the paper would catch fire. But the flameless votives from the dollar tree work great!!!
Our finished project and my beautiful 16 yr old who was upset she did not get to make one :O(

Have fun!!!
BUT : When it is all said and done...it was fun and Allison and I helped Jack get some paper stuck to the jar not just stuck to him.
What you need:
Small jar or glass
white glue
water
sponges (can use paintbrushes, but sponges worked better for us)
napkins torn into 1 inch pieces
Mix the water and white glue equal parts. Tear or cut the napkin into 1 inch pieces. Sponge on some glue mix to the jar and place a piece of napkin on it then sponge on some more glue mix. Continue until all sides are covered.
Our finished jars drying in the sun. Jack's is the one on the left :O)
Have fun!!!
Wednesday, October 22, 2008
Makin Soap
This was super easy and I am not sure why I waited so long to try to make soap. We bought a bag of glycerin at Hobby Lobby a couple of months ago, along with a mold, scent, and coloring, but never got around to it.
Here is Allison with our double boiler and the glycerin. I am so sorry I did not measure anything. I think we started out with 6 cubes and as it melted probably used another 6 or so.
Once the glycerin got melted we added the color ... we chose pink... and then a few drops of scent...we chose peppermint...then we mixed well and pour the soap in the mold.
You can not see it but we stuck a snowman ornament in each bar of soap for a holiday type theme. I did not take any after pictures...sorry ... but they popped out of the mold perfectly. Lots of fun for the 9 yr old .... a pretty easy craft over all.
Subscribe to:
Posts (Atom)